Home > Setup and Contacts > Data Import
Data Import
Do you have existing contacts in another applications? With SmartOffice's data import feature, you can quickly bring those records into SmartOffice.
Note: Before you begin, you need a file to import. The file must be in comma-separated values (.csv) format. You can download our example Quick Import - Contact.csv file using the link under the video above. If you create an import file using another application, make sure it’s a .csv file.
Import Contacts from a File
- In the SmartOffice side menu, select Utilities > Data Import Wizard.
Click Quick Import - Contact in the Import Setup List to open the file selection dialog box.
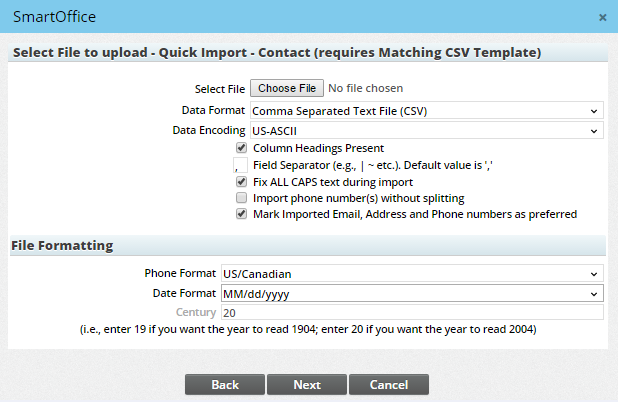
Click Choose file and select the Quick Import - Contact.csv file.
Note: If you use a .csv file other than our example file, it won’t work with our example import setup. You’ll need to create your own import setup. For more information, read our in-depth help article.
Click Next to open the column-mapping dialog box.
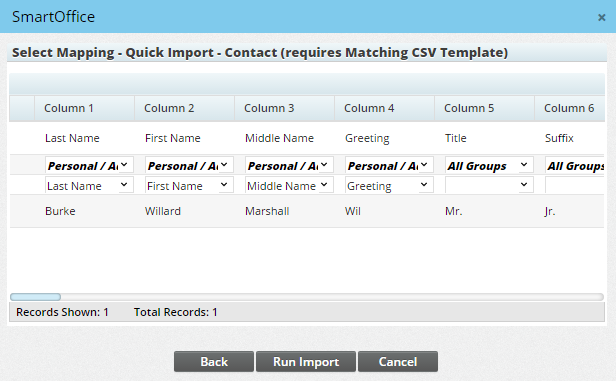
Make sure an appropriate SmartOffice column is mapped to each column in your import file (any unmapped columns won’t be imported).
Tip: Select SmartOffice columns using the drop-down lists. The first drop-down contains “tables,” or column categories.
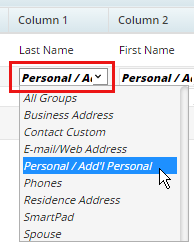
The second drop-down shows all columns in the selected table.

- Check for errors.
- Rows containing errors show an exclamation mark. These rows won’t be imported unless you fix the errors.
- Erroneous data is shown in bold. This can mean that you mapped an inappropriate SmartOffice column for that data, or that there is a problem with the data in the import file.
Once any errors have been resolved, click Run Import.
Note: Any rows that still contain errors will be ignored.
When the import is complete, you’ll see a summary of how many records were processed and imported.

Note the name of the set that SmartOffice created for the contacts, and then click Done.
- Go to the set to review your imported contacts (if you forgot how, review the Sets lesson).