B. Step-by-step instructions
This lesson is about working with lists of records, like the results of a search.
List column adjustment, sorting and filtering
- Do a blank search to display all contact and business records (if you forgot how, review the Search course).
On the list of search results, adjust the width of a column:
Point to the line separating the Contact Name and Type columns. The mouse pointer turns into a double arrow.

- Click and hold the mouse button.
- Move the pointer to resize the column width, and then release the mouse button.
- Sort the list:
- Click the Contact Name column heading. Note that the sorting order of the list changes from ascending to descending order.
- Click the Contact Name column again. The sorting order switches back to ascending order.
- Click the Birth Date column heading to sort the list by birth date.
- Change the sorting order by repeatedly clicking the Birth Date column heading.
Filter columns to narrow down the number of records displayed:
On the Type column heading, click the Apply Column Filter button.
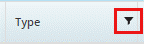
A menu of filter options appears.
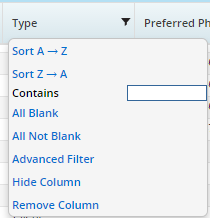
In the Contains field, type Client and press Enter. The list refreshes to display only those records whose type is Client.
On the Birth Date column heading, click the Apply Column Filter button to open that column’s filter options.
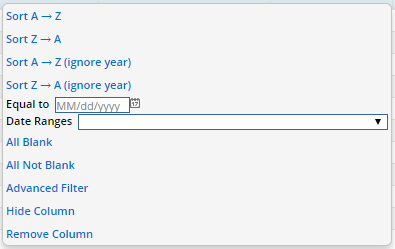
From the Date Ranges drop-down list, select Next 30 Days Ignore Year (scroll all the way to the bottom of the drop-down list to find this choice).
- Note that the list refreshes to display all clients whose birthdays are in the next 30 days. (If none of the contacts meet those criteria, the list will be blank.)
On the Type column heading, click the Undo Column Filter button.
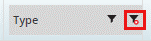
With the Type column filter removed, the list now displays all contacts, regardless of type, whose birthdays are in the next 30 days (if any such records exist).
Advanced list layout options
- Click the Customize List Layout button
 , or select Menu > List Options > List Layout Customization. (If you don’t remember how to access commands in the Menu, review the Contacts course.)
 - Note that SmartOffice displays numerous options for customizing the list columns, sorting and layout. You can explore these options once you’re comfortable with SmartOffice basics.
- For now, remove a column from the list by clicking the Birth Date column under Columns Selected, and then click the Remove button
 .
. - Add the Birth Date field back by clicking the Search button
 and typing birth in the Column Name field. When the Birth Date field appears in the list of matching fields, select it and click OK.
 - Click OK to close the List Layout Customization dialog box.
- If you see a message about applying the change to other users in the office, select Save layout changes for this user only.
Print a list
- Make sure you have Adobe Acrobat Reader installed on your computer (if not, download it from Adobe).
- Select Menu > Print List.
- Click OK. The list opens in PDF format for printing or saving.